The CAD Applet


 1 Introduction  
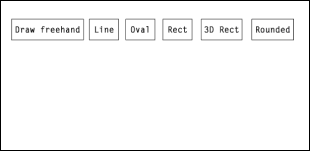
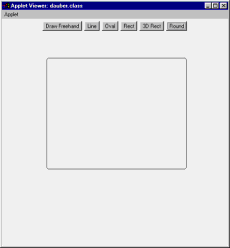
  To explore how graphics works in Java, you¡¦ll learn to create the CAD applet now. You can present the user with a collection of drawing ¡§tools¡¨ ¡X as shown in Figure A.1, these tools will be buttons the user can select from. After the user selects a drawing tool (i.e., by clicking a drawing tool button), they can draw the figure they chose with the mouse.  
   
  Click to expand  
 
  Figure 1: You can present the user with a collection of drawing tools.
 
   
  To draw a rectangle, the user clicks the Rect button, moves the mouse to the place where they¡¦d like their new graphics figure to begin, presses and holds the mouse button, drags the mouse to the other end of the graphics figure, and releases the mouse button. When the mouse button goes up, the applet draws the figure the user has described.  
   
  Let¡¦s see drawing in action. Create a new file named CAD.java now. Open the file and add the new CAD class now:  
       
    public class CAD extends Applet  
    {         .  
              .  
              .  
   
  2. Creating CAD¡¦s Drawing Tools  
   
  You can add drawing tools now as buttons ¡X let¡¦s examine six types of graphics here: lines, ovals (including circles), rectangles, 3D rectangles, rounded rectangles, and freehand drawing. You¡¦ll need six buttons, which you can set up as follows:  
       
    public class CAD extends Applet  
    {  
         Button buttonDraw, buttonLine, buttonOval, buttonRect, button3DRect, buttonRounded;  
    7  
                    .  
                    .  
       
   
  Next, add the six buttons and create them in the init() method:  
       
    public class CAD extends Applet {  
       
         Button buttonDraw, buttonLine, buttonOval, buttonRect, button3DRect, buttonRounded;  
       
         public void init() {  
     
              buttonDraw = new Button("Draw Freehand");  
              buttonLine = new Button("Line");  
              buttonOval = new Button("Oval");  
              buttonRect = new Button("Rect");  
              button3DRect = new Button("3D Rect");  
              buttonRounded = new Button("Round");  
                   .  
                   .  
                   .  
         }  
       
   
  To arrange those buttons, use the default FlowLayout manager here. Just add the buttons to that layout now, as well as adding an ActionListener for each button as follows:  
       
    public class CAD extends Applet implements ActionListener{  
       
         Button buttonDraw, buttonLine, buttonOval, buttonRect, button3DRect;  
         Button buttonRounded;  
       
         public void init() {  
       
              buttonDraw = new Button("Draw Freehand");  
              buttonLine = new Button("Line");  
              buttonOval = new Button("Oval");  
              buttonRect = new Button("Rect");  
              button3DRect = new Button("3D Rect");  
              buttonRounded = new Button("Round");  
       
              add(buttonDraw);  
              buttonDraw.addActionListener(this);  
              add(buttonLine);  
              buttonLine.addActionListener(this);  
              add(buttonOval);  
              buttonOval.addActionListener(this);  
              add(buttonRect);  
              buttonRect.addActionListener(this);  
              add(button3DRect);  
              button3DRect.addActionListener(this);  
              add(buttonRounded);  
              buttonRounded.addActionListener(this);  
                   .  
                   .  
                   .  
         }  
       
   
  Now that your buttons have been installed, you can make them active. Note that the drawing does not take place when the user clicks a drawing tool ¡X it takes place when the user releases the mouse button. That is, the applet draws the required figure in the mouseReleased() method.  
   
  How will the applet know what figure to draw? The applet will have to know which button the user clicked, so it will set some boolean flags, one for each drawing tool, when the user clicks one of the drawing tools.  
       
  Note   A boolean flag is just a boolean variable used to indicate the state (true or false) of some option in a program. For example, windowvisibleboolean may be a boolean flag, which, if true, indicates that a particular window is visible.  
   
  3. Creating CAD¡¦s Boolean Flags  
   
  You will learn to create and initialize your boolean flags now. If the user clicks the line drawing tool, set the flag named bLineFlag to true; if they click the rectangle drawing tool, set the flag named bRectFlag to true, and so on. Your flags will be: bDrawFlag, bLineFlag, bOvalFlag, bRectFlag, b3DRectFlag, and bRoundedFlag, and you should start out with all of them set to false:  
       
    public class CAD extends Applet implements ActionListener {  
       
         Button buttonDraw, buttonLine, buttonOval, buttonRect, button3DRect, buttonRounded;  
       
         boolean bMouseDownFlag = false;  
         boolean bMouseUpFlag = false;  
         boolean bDrawFlag = false;  
         boolean bLineFlag = false;  
         boolean bOvalFlag = false;  
         boolean bRectFlag = false;  
         boolean b3DRectFlag = false;  
         boolean bRoundedFlag = false;  
                   .  
                   .  
                   .  
       
   
  Keep track of the mouse in your CAD applet because CAD draws the graphics figures after the mouse button goes up, so you need to add two new flags, bMouseDownFlag and bMouseUpFlag as follows:  
       
    public class CAD extends Applet implements ActionListener {  
       
         Button buttonDraw, buttonLine, buttonOval, buttonRect, button3DRect, buttonRounded;  
       
         boolean bMouseDownFlag = false;  
         boolean bMouseUpFlag = false;  
         boolean bDrawFlag = false;  
         boolean bLineFlag = false;  
         boolean bOvalFlag = false;  
         boolean bRectFlag = false;  
         boolean b3DRectFlag = false;  
         boolean bRoundedFlag = false;  
                        .  
                        .  
                        .  
       
   
  After you make these flags active, you¡¦ll know in any method of the applet which drawing tool the user has selected and what the mouse state is. That¡¦s what¡¦s important to know ¡X what you¡¦re being asked to draw and when you can draw it. Connect the buttons you¡¦ve installed to these flags, and then you won¡¦t need to think about the buttons any more.  
       
  Tip   In this example, you¡¦re dividing your program into a user interface part (using buttons) and a separate drawing part (using flags). Dividing the parts of a program into self-contained (and therefore easily debugged) parts is usually a good programming practice. Long, monolithic programs get to be unwieldy very quickly.  
   
  You make the drawing tool buttons active in an actionPerformed() method that you can add to your applet now:  
       
         public void actionPerformed(ActionEvent e){  
                        .  
                        .  
                        .  
         }  
       
   
  First, check whether the user clicked the Draw Freehand button to start freehand drawing. The name of this button is buttonDraw, and you can check whether it was clicked this way:  
       
         public void actionPerformed(ActionEvent e){  
              if(e.getSource() == buttonDraw){  
                        .  
                        .  
                        .  
              }  
         }  
       
   
  If so, you can toggle the setting of the freehand drawing flag, bDrawFlag, using the Java exclamation point (!) operator, which reverses boolean values (a value of true becomes false, and a value of false becomes true):  
       
         public void actionPerformed(ActionEvent e){  
              if(e.getSource() == buttonDraw){  
                   bDrawFlag = !bDrawFlag;  
                        .  
                        .  
                        .  
              }  
       
   
  In addition, now that the user has clicked the Draw Freehand button, you should set the other button¡¦s flags to false:  
       
         public void actionPerformed(ActionEvent e){  
              if(e.getSource() == buttonDraw){  
                   bDrawFlag = !bDrawFlag;  
                   bLineFlag = false;  
                   bOvalFlag = false;  
                   bRectFlag = false;  
                   b3DRectFlag = false;  
                   bRoundedFlag = false;  
              }         .  
                        .  
                        .  
         }  
       
   
  You can connect the other buttons to their boolean flags as follows:  
       
         public void actionPerformed(ActionEvent e){  
              if(e.getSource() == buttonDraw){  
                   bDrawFlag = !bDrawFlag;  
                   bLineFlag = false;  
                   bOvalFlag = false;  
                   bRectFlag = false;  
                   b3DRectFlag = false;  
                   bRoundedFlag = false;  
              }  
              if(e.getSource() == buttonLine){  
                   bLineFlag = !bLineFlag;  
                   bDrawFlag = false;  
                   bOvalFlag = false;  
                   bRectFlag = false;  
                   b3DRectFlag = false;  
                   bRoundedFlag = false;  
              }  
              if(e.getSource() == buttonOval){  
                   bOvalFlag = !bOvalFlag;  
                   bLineFlag = false;  
                   bDrawFlag = false;  
                   bRectFlag = false;  
                   b3DRectFlag = false;  
                   bRoundedFlag = false;  
              }  
              if(e.getSource() == buttonRect){  
                   bRectFlag = !bRectFlag;  
                   bLineFlag = false;  
                   bOvalFlag = false;  
                   bDrawFlag = false;  
                   b3DRectFlag = false;  
                   bRoundedFlag = false;  
              }  
              if(e.getSource() == button3DRect){  
                   b3DRectFlag = !b3DRectFlag;  
                   bLineFlag = false;  
                   bOvalFlag = false;  
                   bRectFlag = false;  
                   bDrawFlag = false;  
                   bRoundedFlag = false;  
              }  
              if(e.getSource() == buttonRounded){  
                   bRoundedFlag = !bRoundedFlag;  
                   bLineFlag = false;  
                   bOvalFlag = false;  
                   bRectFlag = false;  
                   b3DRectFlag = false;  
                   bDrawFlag = false;  
              }  
         }  
       
   
  And so, you¡¦ve connected your buttons to the settings of associated boolean flags. You don¡¦t have to worry about the buttons anymore; from now on you can just check the boolean flags you set up.  
   
  4. Drawing in the CAD Applet  
   
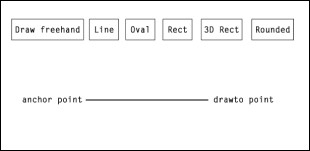
  Now the user turns from the drawing tool buttons to using the mouse to outline the graphics figure they want to draw. They will press the mouse button at some location in your applet that you can call the anchor point, and then they will move the mouse to a new location, which you can call the drawto point. When they release the mouse button, your applet will draw the graphics figure, as bounded by the anchor and drawto points:  
   
  Click to expand  
   
  That¡¦s how you¡¦ll proceed, then ¡X record the location at which the mouse went down in the mousePressed() method and start the drawing process in the mouseReleased() method. Let¡¦s look at the mousePressed() method now.  
   
  5 Using mousePressed() in CAD  
   
  In the mousePressed event, you want to record the beginning point of the graphics figure, the point called the anchor point. You can store points in Java using the Java Point class, which has two data members: x and y. You¡¦ll declare two Point objects, ptAnchor and ptDrawTo in your applet as follows:  
       
    public class CAD extends Applet implements ActionListener {  
       
         Button buttonDraw, buttonLine, buttonOval, buttonRect, button3DRect, buttonRounded;  
       
         Point ptAnchor, ptDrawTo;  
       
         boolean bMouseDownFlag = false;  
         boolean bMouseUpFlag = false;  
         boolean bDrawFlag = false;  
         boolean bLineFlag = false;  
         boolean bOvalFlag = false;  
         boolean bRectFlag = false;  
         boolean b3DRectFlag = false;  
         boolean bRoundedFlag = false;  
                   .  
                   .  
                   .  
       
   
  The x coordinate of a point like ptAnchor can be reached as ptAnchor.x and the y coordinate as prAnchor.y.  
   
  6 Adding MouseListener Support to CAD  
   
  Now you¡¦ll learn how to add the mouse support you need. You¡¦ll implement the MouseListener interface for mousePressed()and mouseReleased(). In addition, you¡¦ll use the mouseDragged() method when you draw freehand with the mouse. To use mouseDragged(), you need a new listener ¡X MouseMotionListener ¡X and you add that as follows:  
       
    public class CAD extends Applet implements ActionListener, MouseListener, MouseMotionListener {  
       
   
  Next, you¡¦ll install your new listeners:  
       
    public class CAD extends Applet implements ActionListener, MouseListener, MouseMotionListener {  
       
         Button buttonDraw, buttonLine, buttonOval, buttonRect, button3DRect, buttonRounded;  
       
         Point ptAnchor, ptDrawTo;  
       
         boolean bMouseDownFlag = false;  
         boolean bMouseUpFlag = false;  
         boolean bDrawFlag = false;  
         boolean bLineFlag = false;  
         boolean bOvalFlag = false;  
         boolean bRectFlag = false;  
         boolean b3DRectFlag = false;  
         boolean bRoundedFlag = false;  
       
         public void init() {  
       
              buttonDraw = new Button("Draw Freehand");  
              buttonLine = new Button("Line");  
              buttonOval = new Button("Oval");  
              buttonRect = new Button("Rect");  
              button3DRect = new Button("3D Rect");  
              buttonRounded = new Button("Round");  
                   .  
                   .  
                   .  
              button3DRect.addActionListener(this);  
              add(buttonRounded);  
              buttonRounded.addActionListener(this);  
              addMouseListener(this);  
              addMouseMotionListener(this);  
         }         .  
                   .  
                   .  
       
   
  Having added the MouseMotionListener, next add the mouse methods you¡¦ll use mousePressed(), mouseReleased(), and mouseDragged().  
       
         public void mousePressed(MouseEvent e){  
                   .  
                   .  
                   .  
         }  
       
         public void mouseReleased(MouseEvent e){  
                   .  
                   .  
                   .  
         }  
       
         public void mouseDragged(MouseEvent e){  
                   .  
                   .  
                   .  
         }  
       
         public void mouseClicked(MouseEvent e){}  
       
         public void mouseEntered(MouseEvent e){}  
       
         public void mouseExited(MouseEvent e){}  
       
         public void mouseMoved(MouseEvent e){}  
   
  The location at which the mouse went down is passed to you with the e.getX() and e.getY() methods, and you want to store that location in the anchor point object, ptAnchor. You can do so by creating a new object of the Point class, passing the x and y coordinates as arguments to the Point class¡¦s constructor:  
       
         public void mousePressed(MouseEvent e){  
              ptAnchor = new Point(e.getX(), e.getY());  
                   .  
                   .  
                   .  
         }  


Do Extra Anchor Points Waste Memory?
   
  Memory-frugal C++ programmers may worry about lines of code like  
   
  ptAnchor = new Point(x, y);  
   
  because the user may click the mouse button several times while using your applet and so execute this line each time. What happens to the old anchor points ¡X do those objects just remain in memory, taking up space? Should you delete them?  
   
  It turns out there is not a delete operator in Java like the one in C++. But that¡¦s not a big problem, because when no object variables refer to a particular object, Java deallocates that object¡¦s memory automatically (a process called automatic garbage collection). If you want to save memory space by getting rid of objects that are no longer needed, simply set their variables to null, for example:  
   
  framewindow = null;  


  Now that the mouse button is down, set the mouse boolean flags, bMouseDownFlag and bMouseUpFlag to indicate the following:  
       
         public void mousePressed(MouseEvent e){  
              bMouseDownFlag = true;  
              bMouseUpFlag = false;  
              ptAnchor = new Point(e.getX(), e.getY());  
         }  
   
  You¡¦ll set the same flags when the mouse button goes back up in the mouseReleased() method.  
   
  7 Using mouseReleased() in CAD  
   
  You can set the mouse boolean flags like this in the mouseReleased() method:  
       
         public void mouseReleased(MouseEvent e){  
              bMouseDownFlag = false;  
              bMouseUpFlag = true;  
                   .  
                   .  
                   .  
         }  
       
   
  Note that when the mouse button goes up the user is indicating the end point of the graphics figure ¡X the drawto point. You can record the drawto point as follows, using the x and y location of the mouse.  
       
         public void mouseReleased(MouseEvent e){  
              bMouseDownFlag = false;  
              bMouseUpFlag = true;  
       
              ptDrawTo = new Point(e.getX(), e.getY());  
                        .  
                        .  
                        .  
         }  
       
   
  Now you have the two points you¡¦ll need to draw your figure, ptAnchor and ptDrawTo. The actual drawing should be done in the paint() method ¡X that is where you are passed an object of the Graphics class to use in painting your applet. To force the paint event to occur, call repaint() in the mouseReleased() method as follows:  
       
         public void mouseReleased(MouseEvent e){  
              bMouseDownFlag = false;  
              bMouseUpFlag = true;  
       
              ptDrawTo = new Point(e.getX(), e.getY());  
              repaint();  
         }  
       
   
  Now you¡¦re ready to draw. So let¡¦s start with one of the most common graphics figures ¡X the line.  
   
  8 Drawing Lines in CAD  
   
  When the user clicks the Line button, they can draw lines in the applet, stretching from the point you called ptAnchor to the point you called ptDrawTo, as shown in Figure A.2.  
   
  Click to expand  
 
  Figure 2: The line extends from the anchor point to the drawto point.
 
   
  Now that the mouse button has been released, the paint() method is called, and you can draw the line. Add the paint() method now:  
       
         public void paint (Graphics g) {  
                   .  
                   .  
                   .  
         }  
       
   
  Because there can be many causes for the paint event, first check to make sure that the mouse button went up ¡X by checking the variables bMouseUpFlag and bLineFlag to make sure you are supposed to be drawing a line. If so, you should draw your figure as follows:  
       
    public void paint (Graphics g) {  
       
         if(bLineFlag && bMouseUpFlag){  
                   .  
                   .  
                   .  
              }  
         }  
       
   
  If you are expected to draw a line, the line is to stretch from the anchor point to the drawto point. Use the Graphics class¡¦s drawLine() method to draw this line, and pass it the start and end coordinates of the line as follows:  
       
         public void paint (Graphics g) {  
       
              if(bLineFlag && bMouseUpFlag){  
                   g.drawLine(ptAnchor.x, ptAnchor.y, ptDrawTo.x, ptDrawTo.y);  
              }  
         }  
       
   
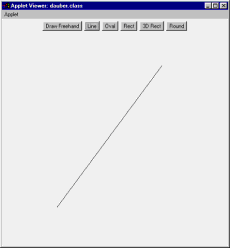
  And now your line appears in the applet, as shown in Figure A.3. The drawLine() method is just one of the methods of the Graphics class ¡X that class¡¦s methods appear in Table A.1.  
   
  Click to expand  
 
  Figure 3: Drawing lines in the CAD applet
 
   
  Table A.1: The methods of the Graphics class  


  Method  
   
  Does This  


  Graphics()  
   
  Constructs a new Graphics object  
 
   
  clearRect(int, int, int, int)  
   
  Clears the given rectangle by filling it with the current background color  
 
   
  clipRect(int, int, int, int)  
   
  Intersects the current clip with the given rectangle  
 
   
  copyArea(int, int, int, int, int, int)  
   
  Copies an area of the Component  
 
   
  create()  
   
  Creates a new Graphics object that is a copy of this Graphics object  
 
   
  create(int, int, int, int)  
   
  Creates a new Graphics object based on this Graphics object but with a new translation and clip area  
 
   
  dispose()  
   
  Disposes of the system resources used by this graphics context  
 
   
  draw3DRect(int, int, int, int, boolean),  
   
  Draws a 3D highlighted outline of the given rectangle  
 
   
  drawArc(int, int, int, int, int, int)  
   
  Draws the outline of an arc covering the given rectangle, starting at startAngle and extending for arcAngle degrees, using the current color  
 
   
  drawBytes(byte[], int, int, int, int)  
   
  Draws the given bytes using the current font and color  
 
   
  drawChars(char[], int, int, int, int)  
   
  Draws the given characters using the current font and color  
 
   
  DrawImage(Image, int, int, Color, ImageObserver)  
   
  Draws as much of the given image as is currently available at the given coordinate with the given solid background  
 
   
  drawImage(Image, int, int, ImageObserver)  
   
  Draws as much of the given image as is currently available at the given coordinate (x, y)  
 
   
  drawImage(Image, int, int, int, int, Color, ImageObserver)  
   
  Draws as much of the given image as has already been scaled to fit inside the given rectangle with the given solid background color  
 
   
  drawImage(Image, int, int, int, int,   ) ImageObserver  
   
  Draws as much of the given image as has already been scaled to fit inside the given rectangle  
 
   
  drawImage(Image, int, int, int, int, int, int, int, int, Color) ImageObserver  
   
  Draws as much of the given area of the given image as is currently available, scaling it to fit inside the given area of destination drawable surface with the given solid the background color  
 
   
  drawImage(Image, int, int, int, int, int, int, int, int, ImageObserver)  
   
  Draws as much of the given area of the given image as is available, scaling it to fit inside the given area of the destination drawable surface  
 
   
  drawLine(int, int, int, int)  
   
  Draws a line between the coordinates (x1,y1) and (x2,y2) using the current color  
 
   
  drawOval(int, int, int, int)  
   
  Draws the outline of an oval covering the given rectangle using the current color  
 
   
  drawPolygon(int[], int[], int)  
   
  Draws the outline of a polygon defined by arrays of x coordinates and y coordinates using the current color  
 
   
  drawPolygon(Polygon)  
   
  Draws the outline of a polygon defined by the given Polygon object using the current color  
 
   
  drawPolyline(int[], int[],int)  
   
  Draws a sequence of connected lines defined by arrays of x coordinates and y coordinates using the current color  
 
   
  drawRect(int, int, int, int)  
   
  Draws the outline of the given rectangle using the current color  
 
   
  drawRoundRect(int, int, int, int, int, int)  
   
  Draws the outline of the given rounded corner rectangle using the current color  
 
   
  drawString(String, int, int)  
   
  Draws the given String using the current font and color  
 
   
  fill3DRect(int, int, int, int, boolean)  
   
  Paints a 3D highlighted rectangle filled with the current color  
 
   
  fillArc(int, int, int, int, int, int)  
   
  Fills an arc bounded by the given rectangle, starting at startAngle and extending for arcAngle degrees, with the current color  
 
   
  fillOval(int, int, int, int)  
   
  Fills an oval bounded by the given rectangle with the current color  
 
   
  fillPolygon(int[], int[],int)  
   
  Fills a polygon defined by arrays of coordinates and y coordinates with the current color using an even-odd fill rule  
 
   
  fillPolygon(Polygon)  
   
  Fills the polygon defined by the given Polygon object with the current color using an even-odd fill rule  
 
   
  fillRect(int, int, int, int)  
   
  Fills the given rectangle with the current color  
 
   
  fillRoundRect(int, int, int, int, int, int)  
   
  Fills the given rounded corner rectangle with the current color  
 
   
  finalize()  
   
  Disposes of this graphics context once it is no longer referenced  
 
   
  getClip()  
   
  Returns a Shape object representing the current clipping area  
 
   
  getClipBounds()  
   
  Returns the bounding rectangle of the current clipping area  
 
   
  getClipRect()  
   
  Deprecated. Replaced by getClipBounds()  
 
   
  getColor()  
   
  Gets the current color  
 
   
  getFont()  
   
  Gets the current font  
 
   
  getFontMetrics()  
   
  Gets the font metrics of the current font  
 
   
  getFontMetrics(Font)  
   
  Gets the font metrics for the given font  
 
   
  setClip(int, int, int, int)  
   
  Sets the current clip to the rectangle given by the given coordinates  
 
   
  setClip(Shape)  
   
  Set the current clipping area to an arbitrary clip shape  
 
   
  setColor(Color)  
   
  Sets the current color to the given color  
 
   
  setFont(Font)  
   
  Sets the font for all subsequent text rendering operations  
 
   
  setPaintMode()  
   
  Sets the logical pixel operation function to the Paint, or overwrite mode  
 
   
  setXORMode(Color)  
   
  Sets the logical pixel operation function to the XOR mode, which alternates pixels between the current color and a new given XOR color  
 
   
  toString()  
   
  Returns a String object representing this Graphics object¡¦s value  
 
   
  translate(int, int)  
   
  Translates the origin of the graphics context to a point in the current coordinate system  


  Now that you¡¦ve learned how to create lines, it¡¦s time to move on to creating circles and ovals.  
   
  9 Creating Circles and Ovals in CAD  
   
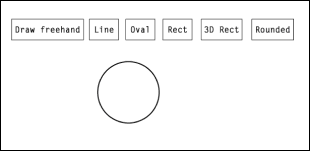
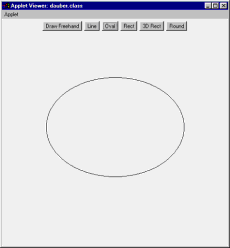
  When the user clicks the Oval tool button, they can draw circles and ovals, as shown in Figure A.4.  
   
  Click to expand  
 
  Figure 4: Drawing a circle
 
   
  Let¡¦s work on creating circles now. You can do that with the Graphics class¡¦s drawOval() method (with which you can draw both ovals and circles). This method ¡X like the other graphics methods you¡¦ll see in this chapter ¡X works slightly differently from the drawLine() method you just used. In drawLine(), you only needed to pass the (x, y) coordinates of the beginning and end of the line. With other graphics methods like drawOval() and drawRect(), you need to pass the upper-left corner of the figure¡¦s bounding rectangle and its width and height:  
   
  Click to expand  
   
  It looks as if you can pass the anchor point as the upper-left corner of the figure¡¦s bounding rectangle. However, there is no special reason that the user would have placed the anchor point at the upper left ¡X in fact, the anchor point may even be at the lower right. Therefore, reorder the anchor point and the drawto point to make sure that the anchor point is at the upper left and the drawto point is at the lower right. (The Java graphics methods require that you pass them the point you know to be the upper left of the image you want to draw.)  
   
  You can reorder these points in the mouseReleased() method, just before you paint the graphics figure the user has requested in your applet. As mentioned, you won¡¦t need to rearrange the two bounding points for the drawLine() method, but you will for the other graphics methods. For that reason, first make sure you are not drawing a line by checking the bLineFlag variable in an if statement, as follows:  
       
         public void mouseReleased(MouseEvent e){  
              bMouseDownFlag = false;  
              bMouseUpFlag = true;  
              ptDrawTo = new Point(e.getX(), e.getY());  
              if(!bLineFlag){  
                   .  
                   .  
                   .  
              }  
              repaint();  
         }  
       
   
  If you are not drawing a line, you can continue on, rearranging the point named ptAnchor to be the top left of your figure¡¦s bounding rectangle and the ptDrawTo point to be the bottom left of the bounding rectangle. You can do that simply by numerically comparing values in each of these points.  
   
  You can use the Java Math class¡¦s min() and max() methods to compare values. The min() method takes two values and returns the lesser; the max() method takes two values and returns the greater. That means that you can sort the anchor and drawto points as follows:  
       
         public void mouseReleased(MouseEvent e){  
              bMouseDownFlag = false;  
              bMouseUpFlag = true;  
              ptDrawTo = new Point(e.getX(), e.getY());  
              If(!bLineFlag){  
              ptDrawTo = new Point(Math.max(e.getX(), ptAnchor.x), Math.max(e.getY(), ptAnchor.y));  
                   ptAnchor = new Point(Math.min(e.getX(), ptAnchor.x), Math.min(e.getY(), ptAnchor.y));  
              }  
              repaint();  
         }  
       
   
  Here you are using the Java Math class, and that class is part of the java.lang package. You need to import that class in the beginning of your applet as follows so Java can find the min() and max() methods:  
       
    import java.awt.Graphics;  
    import java.awt.*;  
    import java.awt.event.*;  
    import java.lang.Math;  
    import java.applet.Applet;  
       
    public class CAD extends Applet implements ActionListener, MouseListener, MouseMotionListener {  
       
         Button buttonDraw, buttonLine, buttonOval, buttonRect, button3DRect, buttonRounded;  
              .  
              .  
              .  
       
   
  Now you¡¦re ready to draw ovals and circles with the drawOval() method. Place the code to draw these figures in the paint() method, which currently looks like this:  
       
         public void paint (Graphics g) {  
              int loop_index;  
              int drawWidth, drawHeight;  
       
              if(bLineFlag && bMouseUpFlag){  
                   g.drawLine(ptAnchor.x, ptAnchor.y, ptDrawTo.x, ptDrawTo.y);  
              }  
              if(bOvalFlag && bMouseUpFlag){  
                   drawWidth = ptDrawTo.x - ptAnchor.x;  
                   drawHeight = ptDrawTo.y - ptAnchor.y;  
                   g.drawOval(ptAnchor.x, ptAnchor.y, drawWidth, drawHeight);  
                        .  
                        .  
                        .  
         }  
       
   
  Here, by examining the boolean flag bMouseUpFlag, check to make sure that the user has released the mouse button and that you should draw the oval or circle. If the flag is set, you are supposed to draw a figure. Next, check the bOvalFlag boolean flag to see if you are supposed to be drawing an oval:  
       
         public void paint (Graphics g) {  
              int loop_index;  
              int drawWidth, drawHeight;  
       
              if(bLineFlag && bMouseUpFlag){  
                   g.drawLine(ptAnchor.x, ptAnchor.y, ptDrawTo.x, ptDrawTo.y);  
              }  
              if(bOvalFlag && bMouseUpFlag){  
                        .  
                        .  
                        .  
              }  
       
   
  To draw the oval or circle, you¡¦ll need the width and height of the figure. Now that you¡¦ve ordered your drawto and anchor points, you can find those dimensions by simple subtraction, as follows:  
       
         public void paint (Graphics g) {  
              int loop_index;  
              int drawWidth, drawHeight;  
       
              if(bLineFlag && bMouseUpFlag){  
                   g.drawLine(ptAnchor.x, ptAnchor.y, ptDrawTo.x, ptDrawTo.y);  
              }  
              if(bOvalFlag && bMouseUpFlag){  
                   drawWidth = ptDrawTo.x - ptAnchor.x;  
                   drawHeight = ptDrawTo.y - ptAnchor.y;  
                        .  
                        .  
                        .  
         }  
       
   
  You can use the Graphics class drawOval() method to draw the oval or circle. Pass it the coordinates of the upper-left point of the figure¡¦s bounding rectangle ¡X that is, your anchor point ¡X and the figure¡¦s width and height:  
       
         public void paint (Graphics g) {  
              int loop_index;  
              int drawWidth, drawHeight;  
       
              if(bLineFlag && bMouseUpFlag){  
                   g.drawLine(ptAnchor.x, ptAnchor.y, ptDrawTo.x, ptDrawTo.y);  
              }  
              if(bOvalFlag && bMouseUpFlag){  
                   drawWidth = ptDrawTo.x - ptAnchor.x;  
                   drawHeight = ptDrawTo.y - ptAnchor.y;  
                   g.drawOval(ptAnchor.x, ptAnchor.y, drawWidth, drawHeight);  
                        .  
                        .  
                        .  
    }  
       
   
  Now you have drawn ovals and circles. The circles and ovals appear on the screen, as shown in Figure A.A.  
   
  Click to expand  
 
  Figure 5: Your CAD applet can draw ovals.
 
   
  10 Using CAD to Draw Rectangles  
   
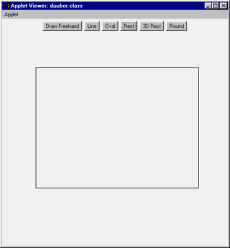
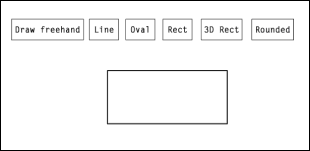
  The next step is to draw rectangles. The user can draw rectangles by clicking the Rect button and using the mouse, as shown in Figure A.6.  
   
  Click to expand  
 
  Figure 6: Drawing a rectangle in CAD
 
   
  You¡¦ve already included all the mouse support that you¡¦ll need to draw rectangles. The Graphics method you¡¦ll use to draw rectangles is drawRect(), and you¡¦ll use that method in your applet¡¦s paint() method. You¡¦ll need to pass the upper-left point of your rectangle and its width and height. First, make sure that you are supposed to be drawing rectangles by checking the bRectFlag boolean flag (set when the user clicks the Rect button):  
       
         public void paint (Graphics g) {  
              int loop_index;  
              int drawWidth, drawHeight;  
       
              if(bLineFlag && bMouseUpFlag){  
                   g.drawLine(ptAnchor.x, ptAnchor.y, ptDrawTo.x, ptDrawTo.y);  
              }  
              if(bOvalFlag && bMouseUpFlag){  
                   drawWidth = ptDrawTo.x - ptAnchor.x;  
                   drawHeight = ptDrawTo.y - ptAnchor.y;  
                   g.drawOval(ptAnchor.x, ptAnchor.y, drawWidth, drawHeight);  
              }  
              if(bRectFlag && bMouseUpFlag){  
                        .  
                        .  
                        .  
              }  
   
  If you are indeed drawing rectangles, use the drawRect() method, passing it the four parameters it needs: the upper-left point of the rectangle¡¦s x and y coordinates, as well as the rectangle¡¦s width and height:  
       
         public void paint (Graphics g) {  
              int loop_index;  
              int drawWidth, drawHeight;  
       
              if(bLineFlag && bMouseUpFlag){  
                   g.drawLine(ptAnchor.x, ptAnchor.y, ptDrawTo.x, ptDrawTo.y);  
              }  
              if(bOvalFlag && bMouseUpFlag){  
                   drawWidth = ptDrawTo.x - ptAnchor.x;  
                   drawHeight = ptDrawTo.y - ptAnchor.y;  
                   g.drawOval(ptAnchor.x, ptAnchor.y, drawWidth, drawHeight);  
              }  
              if(bRectFlag && bMouseUpFlag){  
                   drawWidth = ptDrawTo.x - ptAnchor.x;  
                   drawHeight = ptDrawTo.y - ptAnchor.y;  
                   g.drawRect(ptAnchor.x, ptAnchor.y, drawWidth, drawHeight);  
         }  
       
   
  Now the user can draw rectangles in your CAD applet, as shown in Figure A.7.  
   
  Click to expand  
 
  Figure 7: Your CAD applet can draw rectangles.
 
   
  11  Drawing 3D Rectangles in CAD  
   
  It¡¦s also theoretically possible to draw 3D rectangles in CAD; that process works just as it did for drawing rectangles, except that you use the draw3DRect() method (adding a final parameter set to true is supposed to make the rectangle appear 3D, or raised):  
       
    public void paint (Graphics g) {  
              int loop_index;  
              int drawWidth, drawHeight;  
       
              if(bLineFlag && bMouseUpFlag){  
                   g.drawLine(ptAnchor.x, ptAnchor.y, ptDrawTo.x, ptDrawTo.y);  
              }  
              if(bOvalFlag && bMouseUpFlag){  
                   drawWidth = ptDrawTo.x - ptAnchor.x;  
                   drawHeight = ptDrawTo.y - ptAnchor.y;  
                   g.drawOval(ptAnchor.x, ptAnchor.y, drawWidth, drawHeight);  
              }  
              if(bRectFlag && bMouseUpFlag){  
                   drawWidth = ptDrawTo.x - ptAnchor.x;  
                   drawHeight = ptDrawTo.y - ptAnchor.y;  
                   g.drawRect(ptAnchor.x, ptAnchor.y, drawWidth, drawHeight);  
              }  
              if(b3DRectFlag && bMouseUpFlag){  
                   drawWidth = ptDrawTo.x - ptAnchor.x;  
                   drawHeight = ptDrawTo.y - ptAnchor.y;  
                   g.draw3DRect(ptAnchor.x, ptAnchor.y, drawWidth,drawHeight, true);  
                        .  
                        .  
                        .  
       
  Note   The truth is, drawing a 3D rectangle is impossible; it results in simply a rectangle ¡X at least in the current version of Java.  
   
  12 Drawing Rounded Rectangles in CAD  
   
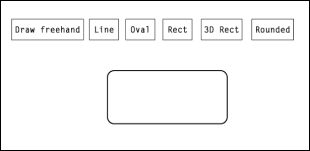
  Now that you are able to draw rectangles, it turns out that you can draw rectangles with rounded corners easily. When the user clicks the button you¡¦ve labeled Rounded, they can use the mouse to draw rounded rectangles, as shown in Figure A.8.  
   
  Click to expand  
 
  Figure 8: Drawing a rectangle with rounded corners
 
   
  Because you¡¦ve stored the anchor and drawto points already, all the mouse handling has already been done when it comes time to draw your new rounded rectangle ¡X you can determine the rectangle¡¦s width and height, and you already know the location of its upper-left corner. All you have to do in the paint() method is check if you are supposed to draw a rounded rectangle by examining the bRoundedFlag boolean flag:  
       
         public void paint (Graphics g) {  
              int loop_index;  
              int drawWidth, drawHeight;  
       
              if(bLineFlag && bMouseUpFlag){  
                   g.drawLine(ptAnchor.x, ptAnchor.y, ptDrawTo.x, ptDrawTo.y);  
              }  
              if(bOvalFlag && bMouseUpFlag){  
                   drawWidth = ptDrawTo.x - ptAnchor.x;  
                   drawHeight = ptDrawTo.y - ptAnchor.y;  
                   g.drawOval(ptAnchor.x, ptAnchor.y, drawWidth, drawHeight);  
                        .  
                        .  
                        .  
              if(bRoundedFlag && bMouseUpFlag){  
                   .  
                   .  
                   .  
              }  
       
   
  If you are supposed to draw rounded rectangles, you can call the Graphics method drawRoundRect(). This method takes the usual parameters ¡X the coordinates of the upper left of the rectangle, as well as its height and width ¡X and two new parameters as well. These new parameters control the rounding of the corners. The first parameter is the width of the rounding arc (in pixels) and the second parameter is the height of the rounding arc. In this example, give both of these parameters the value of 10:  
       
         public void paint (Graphics g) {  
              int loop_index;  
              int drawWidth, drawHeight;  
       
              if(bLineFlag && bMouseUpFlag){  
                   g.drawLine(ptAnchor.x, ptAnchor.y, ptDrawTo.x, ptDrawTo.y);  
              }  
              if(bOvalFlag && bMouseUpFlag){  
                   drawWidth = ptDrawTo.x - ptAnchor.x;  
                   drawHeight = ptDrawTo.y - ptAnchor.y;  
                   g.drawOval(ptAnchor.x, ptAnchor.y, drawWidth, drawHeight);  
                        .  
                        .  
                        .  
              if(bRoundedFlag && bMouseUpFlag){  
                   drawWidth = ptDrawTo.x - ptAnchor.x;  
                   drawHeight = ptDrawTo.y - ptAnchor.y;  
                   g.drawRoundRect(ptAnchor.x, ptAnchor.y, drawWidth, drawHeight, 10, 10);  
              }  
       
   
  And now the user can draw rounded rectangles, as shown in Figure A.9.  
   
  Click to expand  
 
  Figure 9: Your CAD applet can draw rounded rectangles.
 
   
  That¡¦s it for the standard graphics figures: lines, circles, ovals, rectangles, and rounded rectangles. However, you can go one better ¡X you can support freehand drawing in your CAD applet, letting the user draw with the mouse. You¡¦ll learn all about that that next.  
   
  13 CAD and Freehand Drawing  
   
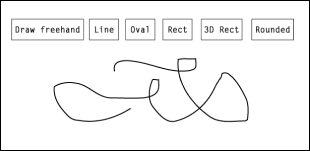
  After the user clicks the freehand drawing tool ¡X the button labeled Draw Freehand ¡X they can draw with the mouse, as shown in Figure A.10.  
   
  Click to expand  
 
  Figure 10: A freehand drawing
 
   
  The user can do this by pressing the mouse button at some starting location in your applet and dragging the mouse. To handle this new capability, you can use the mouseDrag() method:  
       
         public void mouseDragged(MouseEvent e){  
                        .  
                        .  
                        .  
         }  
       
   
  This method is called when the user drags the mouse. You can check if they have selected the Draw tool by looking at the bDrawFlag boolean flag:  
       
         public void mouseDragged(MouseEvent e){  
              if(bDrawFlag){  
                   .  
                   .  
                   .  
              }  
         }  
       
   
  One way of drawing freehand with the mouse is to record the mouse locations as the mouse is dragged around in your applet and then ¡§connect the dots.¡¨ That is, you can store each point you get in the mouseDrag event and then draw from point to point in the paint() method.  
   
  Start that process by storing the points you get in the mouseDrag event in an array of Point objects named, say, pts[]. You can declare an array of, say, 1000 Point objects. The syntax of declaring an array in Java is like this: Type name[] = new Type[number]. This means you can declare your array of points as follows:  
       
    import java.awt.Graphics;  
    import java.awt.*;  
    import java.awt.event.*;  
    import java.lang.Math;  
    import java.applet.Applet;  
       
    public class CAD extends Applet implements ActionListener, MouseListener, MouseMotionListener {  
       
         Button buttonDraw, buttonLine, buttonOval, buttonRect, button3DRect, buttonRounded;  
       
         Point pts[] = new Point[1000];  
         Point ptAnchor, ptDrawTo;  
                     .  
                     .  
                     .  
       
  Note   Technically, Java only supports one-dimensional arrays. Two-dimensional arrays are really arrays of one-dimensional arrays.  For example, here is how you declare and initialize a 3 x 3 two-dimensional array of String objects:  


  String stringarray[][] =  
   
  {  
   
       {"Hello", "there", "USA"},  
   
       {"Hello", "there", "Asia"},  
   
       {"Hello", "there", "World!"},  
   
  };  
   
  Now you¡¦ve set up the array of points to store the mouse locations as the user moves the mouse. In addition, you will need an index value in that array so that you will be able to tell where to add the next point and how many points there are to draw. You can call that array index ptindex:  
       
    import java.awt.Graphics;  
    import java.awt.*;  
    import java.awt.event.*;  
    import java.lang.Math;  
    import java.applet.Applet;  
       
    public class CAD extends Applet implements ActionListener, MouseListener, MouseMotionListener {  
       
         Button buttonDraw, buttonLine, buttonOval, buttonRect, button3DRect, buttonRounded;  
       
         Point pts[] = new Point[1000];  
         Point ptAnchor, ptDrawTo;  
         int ptindex = 0;  
                .  
                .  
                .  
       
   
  Now your point array is set up, and you can add points to it in the mouseDrag() method. The point passed to you is the current location of the mouse, so add that to your points[] array this way, incrementing ptindex after you have done so:  
       
         public void mouseDragged(MouseEvent e){  
              if(bDrawFlag){  
                   pts[ptindex] = new Point(e.getX(), e.getY());  
                   ptindex++;  
                        .  
                        .  
                        .  
              }  
         }  
       
  Note   The C++ operator ++ simply increments a variable. Used this way, as a postfix operator: pts[ptindex++] = new Point(x, y);, it adds 1 to the variable ptindex after the whole statement is executed. Used as a prefix operator: pts[++ptindex] = new Point(x, y);, it adds 1 to ptindex before the rest of the statement is executed, and so you use that new, incremented value as the array index. The operator ++ is an operator that may be overloaded, so you should not assume that it always adds 1 when used ¡X it may have been redefined for a certain class to add, say, 1000, or even the characters ¡§abc¡¨.  
   
  Add a new point made from the x and y parameters passed to you, store it in the pts[] array, and then increment the array index named ptindex. After you have stored the point, call repaint() to draw the points in the array on the screen:  
       
    public void mouseDragged(MouseEvent e){  
              if(bDrawFlag){  
                   pts[ptindex] = new Point(e.getX(), e.getY());  
                   ptindex++;  
                   repaint();  
              }  
         }  
       
   
  All that remains is to add code to the paint() method to draw the points in the pts[] array. First, in the paint() method, check to make sure you are supposed to be drawing freehand by examining the bDrawFlag boolean flag:  
       
         public void paint (Graphics g) {  
              int loop_index;  
              int drawWidth, drawHeight;  
       
              if(bLineFlag && bMouseUpFlag){  
                   g.drawLine(ptAnchor.x, ptAnchor.y, ptDrawTo.x, ptDrawTo.y);  
              }  
              if(bOvalFlag && bMouseUpFlag){  
                   drawWidth = ptDrawTo.x - ptAnchor.x;  
                   drawHeight = ptDrawTo.y - ptAnchor.y;  
                   g.drawOval(ptAnchor.x, ptAnchor.y, drawWidth, drawHeight);  
                        .  
                        .  
                        .  
              if(bDrawFlag){  
                   .  
                   .  
                   .  
              }  
         }  
       
   
  If the user is to draw freehand, that means you will draw the points in the pts[] array. You can loop over all those points, from 0 to the value in ptindex with a for loop. In general, this loop looks just like it would in C or C++:  
       
    for(initial statement; conditional test; increment statement){  
              loop body  
    }  
       
   
  You use the initial statement to set up a loop index, the conditional test to see if you have looped enough, and the increment statement to increment (or decrement) your loop index. In this case, you can loop over all the points in the points[] array as follows:  
       
            public void paint (Graphics g) {  
               int loop_index;  
               int drawWidth, drawHeight;  
       
               if(bLineFlag && bMouseUpFlag){  
                   g.drawLine(ptAnchor.x, ptAnchor.y, ptDrawTo.x, ptDrawTo.y);  
              }  
               if(bOvalFlag && bMouseUpFlag){  
                   drawWidth = ptDrawTo.x - ptAnchor.x;  
                   drawHeight = ptDrawTo.y - ptAnchor.y;  
                   g.drawOval(ptAnchor.x, ptAnchor.y, drawWidth, drawHeight);  
                        .  
                        .  
                        .  
              if(bRoundedFlag && bMouseUpFlag){  
                   drawWidth = ptDrawTo.x - ptAnchor.x;  
                   drawHeight = ptDrawTo.y - ptAnchor.y;  
                   g.drawRoundRect(ptAnchor.x, ptAnchor.y, drawWidth, drawHeight, 10, 10);  
              }  
              if(bDrawFlag){  
    for(loop_index = 0; loop_index < ptindex - 1; loop_index++){  
                        .  
                        .  
                        .  
                   }  
              }  
         }  
       
  Note   There are three types of loops in Java ¡X for, while, and do loops. Their syntax looks like this:  


  for(initial statement; conditional test; increment statement){  
   
            loop body  
   
  }  


  while(conditional test){  
   
            loop body  
   
  }  


  do{  
   
            loop body  
   
  }while(conditional test(/)[/]  
   
  You will then connect the dots, drawing a line from one point to the next, which will display a continuous freehand drawing on the screen. You can draw all these line segments with the Graphics drawLine() method:  
       
         public void paint (Graphics g) {  
              int loop_index;  
              int drawWidth, drawHeight;  
       
              if(bLineFlag && bMouseUpFlag){  
                   g.drawLine(ptAnchor.x, ptAnchor.y, ptDrawTo.x, ptDrawTo.y);  
              }  
              if(bOvalFlag && bMouseUpFlag){  
                   drawWidth = ptDrawTo.x - ptAnchor.x;  
                   drawHeight = ptDrawTo.y - ptAnchor.y;  
                   g.drawOval(ptAnchor.x, ptAnchor.y, drawWidth, drawHeight);  
                        .  
                        .  
                        .  
              if(bDrawFlag){  
                   for(loop_index = 0; loop_index < ptindex - 1; loop_index++){  
                        g.drawLine(pts[loop_index].x, pts[loop_index].y, pts[loop_index + 1].x, pts[loop_index + 1].y);  
                   }  
              }  
         }  
       
  Note   You may wonder why you used lines to connect the points you stored when the mouse moved across our applet, instead of just drawing the points themselves. The reason is that the mouseDrag() method is not called for each pixel the mouse moves over ¡X there are only a limited number of mouse events generated each second, and if you just drew the individual points you got, you¡¦d end up with a series of unconnected points trailing over the screen.  
   
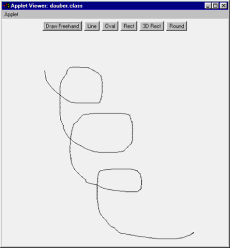
  That¡¦s all there is to it ¡X now run the CAD applet, and click the Draw button. When you do, you can draw freehand with the mouse, as shown in Figure A.11. That¡¦s it for freehand drawing ¡X and that¡¦s it for the CAD applet. You¡¦ve come far in this applet ¡X from handling the mouse to drawing graphics like lines, circles, ovals, rectangles, and more. You¡¦ve gotten a good start in graphics handling. You can find the code for this applet in CAD.java.  
   
  Click to expand  
 
  Figure 11: Your CAD applet supports freehand drawing.
 
   
  14 CAD.java§¹¾ãµ{¦¡½X  
       
    import java.awt.Graphics;  
    import java.awt.*;  
    import java.awt.event.*;  
    import java.lang.Math;  
    import java.applet.Applet;  
       
    public class CAD extends Applet implements ActionListener, MouseListener, MouseMotionListener {  
       
         Button buttonDraw, buttonLine, buttonOval, buttonRect, button3DRect, buttonRounded;  
       
         Point pts[] = new Point[1000];  
         Point ptAnchor, ptDrawTo;  
         int ptindex = 0;  
       
         boolean bMouseDownFlag = false;  
         boolean bMouseUpFlag = false;  
         boolean bDrawFlag = false;  
         boolean bLineFlag = false;  
         boolean bOvalFlag = false;  
         boolean bRectFlag = false;  
         boolean b3DRectFlag = false;  
         boolean bRoundedFlag = false;  
       
         public void init() {  
       
              buttonDraw = new Button("Draw Freehand");  
              buttonLine = new Button("Line");  
              buttonOval = new Button("Oval");  
              buttonRect = new Button("Rect");  
              button3DRect = new Button("3D Rect");  
              buttonRounded = new Button("Round");  
       
              add(buttonDraw);  
              buttonDraw.addActionListener(this);  
              add(buttonLine);  
              buttonLine.addActionListener(this);  
              add(buttonOval);  
              buttonOval.addActionListener(this);  
              add(buttonRect);  
              buttonRect.addActionListener(this);  
              add(button3DRect);  
              button3DRect.addActionListener(this);  
              add(buttonRounded);  
              buttonRounded.addActionListener(this);  
              addMouseListener(this);  
              addMouseMotionListener(this);  
         }  
       
         public void mousePressed(MouseEvent e){  
              bMouseDownFlag = true;  
              bMouseUpFlag = false;  
              ptAnchor = new Point(e.getX(), e.getY());  
         }  
       
         public void mouseReleased(MouseEvent e){  
              bMouseDownFlag = false;  
              bMouseUpFlag = true;  
              ptDrawTo = new Point(e.getX(), e.getY());  
                   if(!bLineFlag){  
                   ptDrawTo = new Point(Math.max(e.getX(), ptAnchor.x), Math.max(e.getY(), ptAnchor.y));  
                   ptAnchor = new Point(Math.min(e.getX(), ptAnchor.x), Math.min(e.getY(), ptAnchor.y));  
              }  
              repaint();  
         }  
       
         public void mouseDragged(MouseEvent e){  
              if(bDrawFlag){  
                   pts[ptindex] = new Point(e.getX(), e.getY());  
                   ptindex++;  
                   repaint();  
              }  
         }  
       
         public void mouseClicked(MouseEvent e){}  
       
         public void mouseEntered(MouseEvent e){}  
       
         public void mouseExited(MouseEvent e){}  
       
         public void mouseMoved(MouseEvent e){}  
       
         public void paint (Graphics g) {  
              int loop_index;  
              int drawWidth, drawHeight;  
       
              if(bLineFlag && bMouseUpFlag){  
                   g.drawLine(ptAnchor.x, ptAnchor.y, ptDrawTo.x, ptDrawTo.y);  
              }  
              if(bOvalFlag && bMouseUpFlag){  
                   drawWidth = ptDrawTo.x - ptAnchor.x;  
                   drawHeight = ptDrawTo.y - ptAnchor.y;  
                   g.drawOval(ptAnchor.x, ptAnchor.y, drawWidth, drawHeight);  
              }  
              if(bRectFlag && bMouseUpFlag){  
                   drawWidth = ptDrawTo.x - ptAnchor.x;  
                   drawHeight = ptDrawTo.y - ptAnchor.y;  
                   g.drawRect(ptAnchor.x, ptAnchor.y, drawWidth, drawHeight);  
              }  
              if(b3DRectFlag && bMouseUpFlag){  
                   drawWidth = ptDrawTo.x - ptAnchor.x;  
                   drawHeight = ptDrawTo.y - ptAnchor.y;  
                   g.draw3DRect(ptAnchor.x, ptAnchor.y, drawWidth, drawHeight, true);  
              }  
              if(bRoundedFlag && bMouseUpFlag){  
                   drawWidth = ptDrawTo.x - ptAnchor.x;  
                   drawHeight = ptDrawTo.y - ptAnchor.y;  
                   g.drawRoundRect(ptAnchor.x, ptAnchor.y, drawWidth, drawHeight, 10, 10);  
              }  
              if(bDrawFlag){  
                   for(loop_index = 0; loop_index < ptindex - 1; loop_index++){  
                        g.drawLine(pts[loop_index].x, pts[loop_index].y, pts[loop_index + 1].x, pts[loop_index + 1].y);  
                   }  
              }  
         }  
       
         public void actionPerformed(ActionEvent e){  
              if(e.getSource() == buttonDraw){  
                   bDrawFlag = !bDrawFlag;  
                   bLineFlag = false;  
                   bOvalFlag = false;  
                   bRectFlag = false;  
                   b3DRectFlag = false;  
                   bRoundedFlag = false;  
              }  
              if(e.getSource() == buttonLine){  
                   bLineFlag = !bLineFlag;  
                   bDrawFlag = false;  
                   bOvalFlag = false;  
                   bRectFlag = false;  
                   b3DRectFlag = false;  
                   bRoundedFlag = false;  
              }  
              if(e.getSource() == buttonOval){  
                   bOvalFlag = !bOvalFlag;  
                   bLineFlag = false;  
                   bDrawFlag = false;  
                   bRectFlag = false;  
                   b3DRectFlag = false;  
                   bRoundedFlag = false;  
              }  
              if(e.getSource() == buttonRect){  
                   bRectFlag = !bRectFlag;  
                   bLineFlag = false;  
                   bOvalFlag = false;  
                   bDrawFlag = false;  
                   b3DRectFlag = false;  
                   bRoundedFlag = false;  
              }  
              if(e.getSource() == button3DRect){  
                   b3DRectFlag = !b3DRectFlag;  
                   bLineFlag = false;  
                   bOvalFlag = false;  
                   bRectFlag = false;  
                   bDrawFlag = false;  
                   bRoundedFlag = false;  
              }  
              if(e.getSource() == buttonRounded){  
                   bRoundedFlag = !bRoundedFlag;  
                   bLineFlag = false;  
                   bOvalFlag = false;  
                   bRectFlag = false;  
                   b3DRectFlag = false;  
                   bDrawFlag = false;  
              }  
         }  
    }